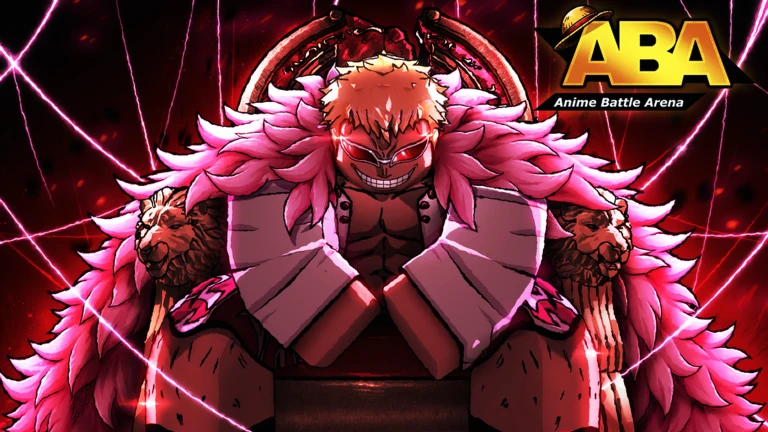
ABA Doflamingo Guide: Mastering the String User in Anime Battle Arena
Master ABA Doflamingo with our comprehensive guide. Discover expert combos, move set analysis, and pro strategies to dominate your matches in Anime Battle Arena.
Published:
Table of Contents
Anime Battle Arena (ABA) has recently expanded its roster with one of the most anticipated characters in the community: the notorious Donquixote Doflamingo. If you have been wondering how to dominate the battlefield with this string-manipulating powerhouse, you are in the right place. Mastering aba doflamingo requires a deep understanding of his unique kit, which blends high-damage guard breaks with exceptional aerial utility, making him a formidable choice for both ranked and public matches.
In this guide, we dive deep into the mechanics that make aba doflamingo a top-tier threat. From his base kit versatility to the devastating pressure applied during his Awakening, we cover everything you need to know to climb the ranks and outplay your opponents. Whether you are a newcomer or a seasoned ABA veteran, understanding how to transition from his neutral game to his lethal awakening will be the key to your success.
Understanding Doflamingo’s Base Kit Mechanics
Doflamingo’s base form is designed for those who appreciate technical play. Unlike characters who rely on simple spam, he rewards players who can control the pacing of a fight through spacing and movement. His kit provides multiple tools to punish aggressive opponents while maintaining the ability to reset neutral if things go south.
Base Ability Overview
Move Name
Damage
Guard Break
Primary Use
Move 1 (Hyper Armor)
20
No
Trade hits / Interrupt
Move 2 (Overheat)
20
Yes
Guard break / Neutral
Move 3 (Cleave/Air)
20
No
Combo extension / Anti-air
Move 4 (Parasite)
N/A
Yes
Crowd control / Stun
According to community feedback, the most effective way to play base Doflamingo is to treat him as a "spacing specialist." His aerial mobility allows you to stay out of the reach of sword-wielding characters while poking them with string attacks.
Maximizing Neutral Pressure
Always look for opportunities to use your Guard Break (Move 2) when an opponent tries to play defensively. If you successfully bait their evasive move, follow up with an aerial combo to maximize damage output.
Essential Combos for Competitive Play
To truly unlock the potential of aba doflamingo, you must memorize his optimal combo paths. Many of his moves are not "true," meaning you must be precise with your timing to ensure your opponent cannot jump or block out of your strings.
The "No Arms" Combo Strategy
One of the most powerful aspects of Doflamingo is his ability to strip opponents of their capability to block or use standard M1s. By utilizing his air-counter moves effectively, you can land devastating follow-up attacks that would otherwise be blocked.
Start with an Overheat guard break to force a reaction.
Dash in and perform an aerial jump followed by Move 3.
If successful, follow up with a quick series of M1s.
Execute the "no-arms" variant of your special moves to prevent the enemy from countering.
Combo Stage
Action
Expected Result
Opener
Overheat (Move 2)
Enemy Guard Broken
Extender
Aerial Move 3
Knockback & Set-up
Finisher
Parasite/Special
High burst damage
Always remember that these combos are highly dependent on your positioning. Practice these patterns in the training mode provided by the game developers at Dogs Studios: South before taking them into ranked play.
Awakening: The Birdcage Era
Entering Awakening mode is where Doflamingo truly shines. He gains access to massive area-of-effect (AOE) moves that can turn the tide of a 3v3 match instantly. His signature move, Birdcage, is not just for show; it is an incredible tool for zoning and securing kills against retreating enemies.
Awakening Move Breakdown
The awakening form transitions Doflamingo into a dominant presence. While the transformation animation can be long, the damage potential and the introduction of Haki-infused strings make him nearly unstoppable in the right hands.
Ever White: An AOE stun that tethers enemies in place. Use this to set up two full M1 combos.
Flap Thread: A high-damage barrage. If used on an enemy caught in Ever White, the damage is doubled, making it one of the most efficient finishers in the game.
Birdcage: Use this for its invincibility frames (i-frames). Even in ranked 1v1s, the safety it provides makes it a top-tier defensive option.
Common Mistakes and How to Avoid Them
Even experienced players struggle with aba doflamingo when they first pick him up. The most common error is mismanaging cooldowns during neutral game. Because his moves have relatively long recovery times if they miss, failing to land a move leaves you completely vulnerable to a counter-combo.
The Over-Commitment Trap: Do not throw out Move 4 (Parasite) in neutral unless you are certain the opponent is locked in a long charge-up animation. Its long startup makes it a risky move in high-level ranked matches.
Ignoring Aerial Utility: Many players stick to the ground. Doflamingo is designed for the air. Use his double jumps and teleports to reposition. If you stay on the ground, you lose the primary advantage his kit provides.
Failure to Bait: Players often complain that his moves are "untrue." Often, this is because they are not baiting the opponent's evasive move (the escape button) first. Always force them to waste their resources before committing to your high-damage combos.
Advanced Tips for Ranking Up
To climb the ladder with aba doflamingo, you need to adapt to your opponent's playstyle. If you are facing a faster character like Minato or a defensive powerhouse like Whitebeard, your strategy should shift significantly.
Against defensive players, prioritize your guard-break moves and keep constant pressure with strings. Against aggressive, high-mobility characters, use your aerial counters and teleports to stay unpredictable. Community reports indicate that "playing reactive" is often better than "playing aggressive" when you are unsure of the matchup.
Recommended Loadout Strategy
Pubs: Focus on Birdcage early to control the map.
Ranked 1v1: Focus on short, high-damage combos utilizing Move 2 for consistent breaks.
Team Modes: Use Parasite to disrupt the enemy team's cohesion and open them up for your teammates.
FAQ: Frequently Asked Questions
Is aba doflamingo considered high tier in the current meta?
Yes, he is widely considered a top-tier character due to his guard-breaking capabilities and the extreme pressure he can apply while in Awakening mode.
How do I land combos if the opponent keeps blocking?
The key to landing combos with aba doflamingo is incorporating guard-breaking moves like Overheat into your sequence. Once the enemy's block is broken, they are defenseless against your follow-up string attacks.
Can Birdcage be used in 1v1 ranked matches?
Absolutely. While it serves as a zoning tool in group play, in 1v1s, Birdcage is primarily useful for its i-frames, allowing you to survive dangerous attacks or stall until your other cooldowns return.
Where can I find more technical info on his strings?
We recommend checking the official Anime Battle Arena Wiki for the latest frame data and specific damage values as the game receives balance updates.
By mastering the movement and timing of aba doflamingo, you will find that you have a tool for every scenario. Keep practicing, focus on your positioning, and remember that consistent, patient play is what separates the average players from the elite.